|
GarBots v1.6
HaresWARE Development
Copyright 2003 All rights reserved
http://www.hares.net/bot.htm
DESCRIPTION:
GarBots is a robot programming game. A subset of the
BASIC language is used to program your GarBot for battle. Program GarBots and
hold tournaments to optimize your best GarBot. Then you can use GarBots Beam
or Export features to exchange your best GarBots (in secure mode) for battle
with a friend. Use available commands to make your GarBot move around the arena,
search for opponents, and take offensive and defensive action to win the battle.
The term - 'the interpreter' is used in this document,
and refers to the internal modules of GarBots that interpret GarBot code and
execute instructions. The GarBots BASIC interpreter is referred to as 'BASIC
like' because of its extremely limited implementation compared to versions
of BASIC that many people are familiar with. But, the interpreters functionality
should be at least minimally suitable for developing quality GarBots.
Demo:
- GarBots will run fully functional for 15 days.
Updates - Bug fixes and minor improvements will
be downloadable at no extra cost when available.
Requirements:
- PalmOS 3.5 device, B&W or Color.
- MathLib
Contents:
General programming
rules
Language reference
GarBot functions
Battle Arena
User interface
General programming
rules:
- White space is perfectly acceptable, including line-feeds, spaces, and
tabs.
- The GarBots language is not case sensitive.
- When your GarBot is out of power, it is out of the game.
- Power is lost by the accumulation of damage from being fired upon.
- Functions that take no arguments are terminated with parentheses, as you
will see throughout this document.
- Simple math functionality is provided for. For example the symbols +, -,
*, / are implicitly implemented, but it is best to explicitly specify precedence
of mathematical operators with the use of parenthesis.
- There is a limit of 100 labels for use in GOTO and GOSUB statements.
- Flow control constructs are nest-able. That is to say that you can embed
IF within IF statements, WHILE within WHILE statements, FOR, and GOSUB statements
too.
top
Language Reference
Variables
Constants
REM
PRINT
GOTO
IF THEN ELSE ENDIF
WHILE NEXT
FOR TO NEXT
GOSUB RETURN
END
MIN MAX ABS
RAND
Math functions
RTOP PTOR
top
Variables
- You are limited to 26 variables, and they are restricted to labels A thru
Z.
- Only integer type variables are supported. No floating point or string variable
assignments are supported.
top
language reference
Constants
ARENAX - Size of the arena in the X direction, with left representing 0
ARENAY - Size of the arena in the Y direction, with top representing 0
DAMAGERAD - Damage Radius - When a shell explodes, any GarBot within DAMAGERAD
from the bomb will incur damage. The damage imposed is a factor of the bots
distance from the explosion (but still within DAMAGERAD distance)
SCANRAD - Scan Radius - The range of a scan, i.e. a scan will not see another
GarBot or drone that is > than SCANRAD distance away.
MAXLIFE - This is the amount of life that all bots involved in a battle are
granted.
DRIVESTEP - DRIVE commands which specify a distance greater than DRIVESTEP
are broken into multiple commands that fit within the DRIVESTEP value.
Example:
r = SCANRAD
x = (ARENAX / 2) ' sets x to one half of ARENAX
top
language reference
REM - represents a program comment. A comment can
also be done with a simple quote or (') mark. Any text that appears after the
REM or ' will be ignored by the interpreter, up to the next linefeed.
Example:
REM this is a comment
top
language reference
PRINT - prints a message to the output area of the
arena. Variables, and constants can be appended to the print statement with
a comma
Example:
PRINT "variable a = ", a
Constraints:
Printing the return value of a function must be done
in a two step process. First assign the return value to a variable, and then
use the variable in PRINT statement as shown in the example. Mathematical expressions
are permitted provided that they are bracketed in parentheses.
top
language reference
GOTO - Causes execution to jump to the specified
label
Example:
x = 1
100
PRINT "x = ", x
x = x + 1
GOTO 100
This example would obviously result in an endless loop
which does nothing but print the value of x and increment.
top
language reference
IF cond THEN ELSE ENDIF
Notes:
- Must end with ENDIF
- Conditional operators include
> Greater than
< Less than
= Equal
>= Greater than or equal
<= Less than or equal
!= Not equal
Example:
IF x > 0 THEN
f = FIRE 45 x
ELSE
DRIVE 180 20
ENDIF
or
IF x = 1 THEN
REM do something
ENDIF
top
language reference
WHILE cond NEXT
Notes:
- Must end with NEXT
- Conditional operators include
> Greater than
< Less than
= Equal
true
false
>= Greater than or equal
<= Less than or equal
!= Not equal
Example:
x = POSX()
WHILE x < SCANRAD
DRIVE 180 10
x = x - 10
NEXT
or
WHILE true
' Your instructions go here
NEXT
This last WHILE example should be used as the main
instruction loop of your GarBot so that it will continue to run until the end
of the game.
top
language reference
FOR cond TO NEXT
Notes:
- Must end with NEXT
- Conditional operators include
> Greater than
< Less than
= Equal
Example:
FOR x = 0 TO 10
FOR y = 0 TO 10
PRINT "x ", x, " y ", y
NEXT
NEXT
top
language reference
GOSUB RETURN - Causes program execution to
branch to the specified label. Execution will resume from the point of the branch
upon RETURN statement
Example:
IF x > 0 THEN
PRINT "Before GOSUB"
GOSUB 100
PRINT "After GOSUB"
ENDIF
100
PRINT "Reached GOSUB 100"
s = SCAN 0 90
f = s
WHILE f > 0
f = FIRE 30 s
IF f = 0 THEN
f = FIRE 60 s
ENDIF
NEXT
PRINT "Returning from GOSUB 100"
RETURN
This example would print the following:
Before GOSUB
Reached GOSUB 100
Returning from GOSUB 100
After GOSUB
top
language reference
END - Causes your GarBot to terminate execution. You
probably shouldn't use this statement, or if you do, do it at the very end
of your program.
top
language reference
Math functions - The following math functions
are supported but are not implemented as floating point values at this time,
and are therefore of limited use. Values returned as in degrees.
COS - Cosine
SIN - Sine
SQRT - Square Root
TAN - Tangent
ATAN - Arctangent
ASIN - Arc-sine
ACOS - Arc-cosine
Example:
x = SQRT 9
top
language reference
MIN - Returns the smaller
value of two arguments
Example:
x = POSX()
x = x + 10
x = MIN x ARENAX
This example would set x to which ever value is smaller,
x or ARENAX
top
language reference
MAX - Returns the larger value
of two arguments
Example:
x = POSX()
x = x - 10
x = MAX x ARENAX
This example would set x to which ever value is larger,
x or ARENAX
top
language reference
ABS - Returns the absolute
value of an argument. In other words, negative values are converted to positive.
Example:
x = SCAN 80 100 ' for example, scan detects a wall
and returns -10
IF x < 0 THEN
x = ABS x
DRIVE 90 x
ENDIF
This example would convert x from -10 to 10, and then
drive right up against the southern wall of the arena
top
language reference
RAND - Returns a random value
no larger than the argument supplied.
Example
x = RAND ARENAX
This example would set x to a random value between
0 and ARENAX
top
language reference
RTOP - Rectangular To Polar
- Converts rectangular coordinates into polar coordinates. Upon return, the
two variables passed in to RTOP will contain the angle in the first argument,
and the distance in the second argument. Because results are returned in the
variables that are passed in, It is required that arguments to RTOP be passed
in as variables rather than constants. It is also important to understand that
the variables passed in to RTOP will no longer contain their original values,
so if they are important to your program, you will have to save those values
before calling RTOP.
Example
x = RAND ARENAX
y = RAND ARENAY
RTOP x y
DRIVE x y
This example establishes an absolute position inside
the arena, and then uses RTOP to calculate the required angle and distance
from the GarBots current location to the absolute position specified.
top
language reference
PTOR - Polar To Rectangular
- Converts polar coordinates into rectangular coordinates. Upon return, the
two variables passed in to PTOR will contain the X position in the first argument,
and the Y position in the second argument. Because results are returned in
the variables that are passed in, It is required that arguments to PTOR be
passed in as variables rather than constants. It is also important to understand
that the variables passed in to PTOR will no longer contain their original
values, so if they are important to your program, you will have to save those
values before calling PTOR.
Example
a = RAND 360
d = RAND ARENAY
PTOR a d
PTOR is probably of limited use in GarBots, but is
implemented for completeness.
top
language reference
GarBot Functions - The following functions
are for controlling your robot
POSX, POSY
POWER
DAMAGE
DRIVE
SCAN
FIRE
top
POSX - Obtain your X coordinate in the arena
POSY - Obtain your Y coordinate in the arena
Example:
x = POSX()
y = POSY()
top
GarBot functions
POWER - Returns the amount
of power a GarBot has.
Example - This example would return how much power
a GarBot has
p = POWER()
top
GarBot functions
DAMAGE - This function
should no longer be used, but is maintained for backwards compatibility.
top
GarBot functions
DRIVE - Causes your GarBot
to move according to specified angle and distance.
Example - The following example would cause your GarBot
to move in the Zero direction (East) by 20 miles.
DRIVE 0 20
top
GarBot functions
SCAN - Scans between a specified
start and end angle for any opponent GarBots.
- Returns zero (0) if nothing is found.
- Returns a negative number indicating a wall was scanned, If a wall was
scanned, you should use the ABS (or Absolute) command to determine the distance
to the wall in a positive value.
- Returns a positive value to indicate an opponent GarBot or drone was found.
The value returned indicates the distance to the opponent. There is no information
available indicating at what exact angle within the start and end scan angles
the opponent was found. Therefore, while scanning a large angle would cover
more area, you would have less information on what angle to FIRE a shell.
Constraints
- You can scan for a maximum of 90 degrees in any one scan. If needed, the
end angle will be adjusted to conform.
Notes:
- The insertion point of all GarBots is the GarBot upper left corner. A scan
will only find an opponent GarBot if the opponents insertion point falls within
the scan area. While watching this can be deceptive since a GarBot who gets
part of its visible area scanned will not return a hit unless its insertion
point is within the scan.
Example:
s = SCAN 30 60
IF s > 0 THEN
FIRE 45 s
ENDIF
REM Note that ELSEIF is not supported
IF s < 0 THEN
REM Change direction
ENDIF
top
GarBot functions
FIRE - Fires a shell at a
specified angle and distance.
Returns the amount of damage imposed on the target
GarBot. The more direct a hit, the more damage is imposed.
Note that there may be more than one GarBot within
DAMAGERAD of the explosion (Including the GarBot delivering the shot), and
the value returned represents the damage imposed on only one of those GarBots
even though all GarBots within DAMAGERAD of the shell will receive damage.
A GarBot FIRE-ing can impose damage on itself if it fires at a range less than
DAMAGERAD.
Examples:
f = FIRE 45 s
FIRE 180 (DAMAGERAD + 10)
top
GarBot functions
BATTLE ARENA
Arena - The arena size is defined by the constants ARENAX and ARENAY, with
top left representing 0,0 and bottom right representing ARENAX, ARENAY
Angles - Angles are oriented as follows
225 270 315
\ | /
\ | /
180 --- o --- 0 (East)
/ | \
/ | \
135 90 45
top
GarBot functions
USER INTERFACE
There are four main screens of GarBots. They are:
Main Screen
Edit
Preferences
Configuration
Arena
Log View
Statistics View
Debugger
top
Main Screen - Prepare
for battle
This screen has a table displaying all of your GarBots,
with some extra information.
Table Columns
- In the first column is a checkbox. If the checkbox is checked, then that
GarBot is marked to compete in the next battle.
- The second column is also a checkbox. This checkbox allows you to suppress
the logging output from that GarBot. This is useful for debugging purposes,
clearing the clutter if too many GarBots are printing log messages.
- The third column is on screen icon that the GarBot will use during a battle.
Click on it to display the Icon Editor dialog.
- The next column is used to edit a GarBot. Click on this column to switch
to the editor.
- The final column is the GarBots name. From some functionality, such as
Delete, or Beam require that a GarBot be selected. Click on this column to
select (highlight) a GarBot.
Other controls
- Lets get it on - Starts the battle.
- Drone Garbots - Choose the number of drone GarBots you want to participate
in the match. A drone GarBot does nothing except sit in one spot and act as
a target. You can have a maximum of 25 drones in a battle. Note that as of
v1.6.0 of GarBots, that you do have the option of wandering drones.
Menu
File
- New - Lets you create a new GarBot. While naming the new GarBot, you will
have the choice of creating the GarBot with a skeleton program, or just blank.
- Clone - This lets you copy a GarBot so you can make changes for testing
if you wish.
- Delete - deletes a GarBot selected from either list.
- Beam - You can beam (or receive) a GarBot to another persons device to
include in a battle. When a GarBot is beamed, it is marked as un-readable
on the receiving device so the GarBots editor will not give away your secrets
to your opponent.
- Export - This is another way of sharing your GarBots. Export differs from
Beam in that instead of beaming a GarBot to another device, it creates a temporary
PDB file on your device, containing the GarBots exported source code (also
secured). The idea here, is that after exporting a GarBot, you should immediately
HotSync so that the newly created PDB file will become available on your computers
hard drive - in the HotSync programs backup directory for your device. The
file will have the same name as the exported GarBot with a PDB extension.
And once located, it can be website uploaded, downloaded, emailed, or distributed
in any other way you might want to distribute a file. To import a GarBot from
a web-page, or email, etc. simply select the GarBot file for HotSync (as you
would do when installing any other PDB or PRC file) and GarBots will automatically
find and import the GarBot without any other interaction required by the user.
Also note, that GarBots are available from developers at both the official
GarBots website http://www.hares.net/bot.htm
and from the official users group http://groups.yahoo.com/group/GarBots/
View
- Log - Brings up the log view. Read on for
further details on this.
- Stats - View the battle statistics from
your last battle. More details on this follow
Setup
- Debugger - This is where you setup the debugger.
More details on this follow
- Preferences - View and modify preferences. More
details on this follow
Help
- Language - A help system for quick reference for syntax etc.
- Help - Splash screen
top
user interface
Edit Screen - Edit your GarBot code.
- Font - Navigate the menu to Setup / Preferences to toggle between normal
and small font.
- Toolbar - controls across the top right side of the screen, from left to
right are as follows.
Shift Indicator / Line number / Cut / Copy / Paste
/ Undo / Toggle Bookmark / Goto Bookmark / Insert Tab / Close
For detailed description, open the editor, and navigate
the menu system to Help / Toolbar
top
user interface
Preferences - There are several preferences
you can set - Menu Setup / Preferences
Small Editor Font - Just as it says, the editor uses
a small font, allowing you to see more of your code at one time.
Collect Battle Stats - When checked, statistics will
be collected for battles. After a battle is over, navigate the menu to View
/ Stats to view the statistics.
Wandering Drones - When checked, drones will wander
aimlessly around the arena, providing a slightly greater challenge.
Battle Time Limit - Zero here indicates no time limit
is imposed. Values of between 1 and 255 indicate how many minutes a battle
should last in the event that there is no 'last GarBot standing'
top
user interface
Configuration - After pressing the 'Lets get
it on' button, you will have a chance to configure certain aspects of the battle.
In fact, by tapping on the screen at any time during a battle, you have a change
to make changes to the configuration. (Available only from the battle field
screen, at the start of a battle or by taping the screen during a battle)
Popup kill message - During a battle, a message will
popup notifying the user of a kill only if this checkbox is checked.
Disable Auto Off - Blocks the device auto off feature.
Allows you to watch the match without the device turning off. This always defaults
to off since it can drain your devices power if left unattended. Note that
if you have Popup kill message checked, then the device might turn off while
a popup is open
Power transfer - If checked, GarBots will gain in power
by the amount of damage the inflict on opponents. A GarBot damaging itself
will still lose power.
Battle Speed - Choose an execution speed between 1
and 255. The lower the number, the faster the Battle runs.
DAMAGERAD - This indicates how large of an area an
explosion will damage. Any value between 1 and 40 can be used, and the larger
the number, the bigger the explosion. But be careful, you can easily wind up
getting caught in your own explosion.
SCANRAD - This controls how far ahead a SCAN command
can see. Any value between 1 and 150 is valid, and the higher the number, the
farther your scans will see.
MAXLIFE - This value controls how much 'life' the GarBots
receive when the battle begins. Valid range between 1 and 64000. The higher
the value, the more life your GarBots start with. If you change this value
in the middle of a battle, all GarBots life will be reset with the new value.
Note that due to the Power transfer feature, that a GarBot can actually accumulate
more power than specified by MAXLIFE.
top
user interface
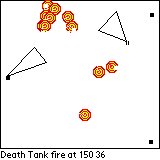
Arena Screen - This is where the battle takes
place.
Upon entering the arena, you will see all the participating
GarBots and drone GarBots drawn on the screen and a Dialog box giving the options
Go, Cancel, Configure (See Configure section). Pressing the Go button starts
the battle. Taping on the screen will give you the choice of terminating the
match early, resuming, or Configure..
There is a small area at the bottom of the arena where
messages are printed as a result of a PRINT statement in any GarBot source
code.
When the battle ends due to user intervention or because
only one GarBot remains standing, the program will return to the Setup Screen
top
user interface
Log View Screen - View the output (PRINT statements)
that GarBots produced during a battle, including syntax error messages from
the interpreter. Menu - View / Log
The Log View is cleared from the previous battle at
the beginning of each battle.
top
user interface
Statistics View Screen - View the statistics
from a battle. Note that you must enable the collection of statistics by navigating
the menu system to Setup / Preferences and toggle the Collect Battle Stats
checkbox. Menu - View / Stats
After a battle is complete, navigate the menu to View
/ Stats to view statistics.
Battle statistics are ranked in the following order:
- The order of defeat is primary. The last bot standing wins, the first bot
defeated is last.
In the vent of a timeout or a user-quit, the rankings
are calculated using the following fields in order of
- priority.
- Number of kills
- Power remaining
- Shot to hit ratio
For example - If, by the end of a timed game, there
are two GarBots alive with 2 kills each, Power Remaining is used to decide
rank. In the unlikely event that there is still a tie for a rank, Shot-to-hit
ratio is used.
The Statistics View is cleared from the previous battle
at the beginning of each battle.
top
user interface
Debugger - The built in interactive debugger
allows you to step through your program, one line at a time, examine values,
and even modify values. Menu - Setup / Debugger
Setup
In order to debug a GarBot, you must first set up
the debugger. Navigate the menu system to Setup / Debugger. The debugger setup
dialog will appear. This dialog consists of a drop down list where you can
select the GarBot you want to debug. Note that only GarBots marked as a battle
participant will appear in the drop down list.
Below the drop down list, you will find a checkbox
marked Enable Debugger. This checkbox must be checked for debugging to work.
Finally, a field marked Breakpoint Line allows you
to set which line of code you want the debugger to break on during execution.
Figure out which line you want to start examining your code, and enter the
line number in this field. Remember that in the editor, you can see what line
your cursor is on, so you don't have to count lines or anything.
Notes:
- If a breakpoint is set on a blank line, or a rem statement, the debugger
will not break until it reaches the next valid line of code.
- A breakpoint set on a label will not break. A label is some number used
as a target of a GOTO or a GOSUB
- Debugger setup settings are saved only until you quit your GarBots session
and run another program.
Debugging
Having setup the debugger, you can now start the
battle. When your GarBots code execution reaches the line you specified, the
debugger dialog will popup, pausing the battle. Note that if you set the break
point on a line that never gets executed, the debugger dialog will never pop
up. Once the debugger dialog pops up, you will notice several buttons.
Edit field / Watch / Update / Step / Run / Quit /
Help
- Edit Field - The debugger will display values of variables or constants
that you want to Watch. This is also where you will give a value for the Update
command.
Watch - Highlight a variable or constant, and press the Watch button. The
value of that variable will appear in the Edit Field.
- Update - Enter a value in the Edit Field, select a variable (constants
are read-only) to update, and press the update button. The variable will now
contain the new value.
- Step - Pressing this button causes the next line of your program to be
executed. Note the line pointers on the left of the dialog that indicate the
breakpoint line and the current line of execution.
- Run - Causes execution to proceed as normal until either the battle ends,
or the breakpoint is reached again.
- Quit - Causes execution to proceed as normal. The debugger will not break
into your code whether or not the breakpoint is reached again.
- Help - Describes the controls discussed here.
top
user interface
|